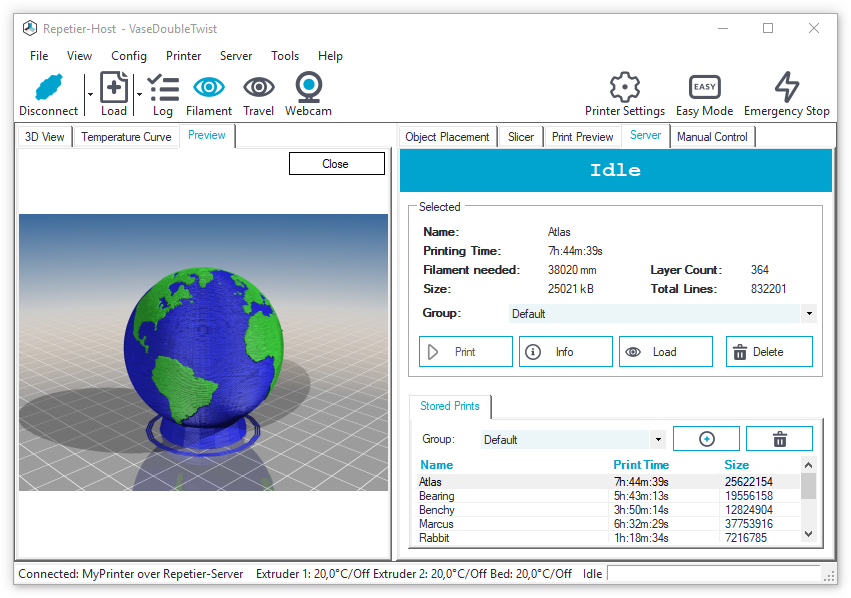
Beginning with version 1.5 of Repetier-Host you can connect your host directly to the server, which gives you a lot of advantages and possibilities:
- Repetier-Server is a small background process, that takes nearly no RAM, even while printing. In contrast the host requires a lot of RAM while printing.
- Repetier-Server can print on multiple printers at the same time.
- A crash of the host will not stop printing.
- You can exit Repetier-Host without stopping printing.
- You can reconnect without disturbing the print.
- Same workflow as with direct host printing.
- Repetier-Server can run on a different PC like a cheap Raspberry Pi or Beagle Bone, so you can place your printer whereever you want and turn off your host PC after starting the print.
- With Repetier-Server frontend you can access and control your printer from everywhere, even with you smartphone or tablet and see via webcam what actually happens.
- Repetier-Server runs on Windows, Mac and Linux.
- Repetier-Host shows rendered G-Codes preview images in the file browser of the host.
- Repetier-Server can compute very accurate printing time predictions and shows them along with detailed statistics like printing costs.
- Repetier-Server can even be included in the printer and has a special touchscreen interface support.
Installation
It is really easy to connect Repetier-Host with Repetier-Server.
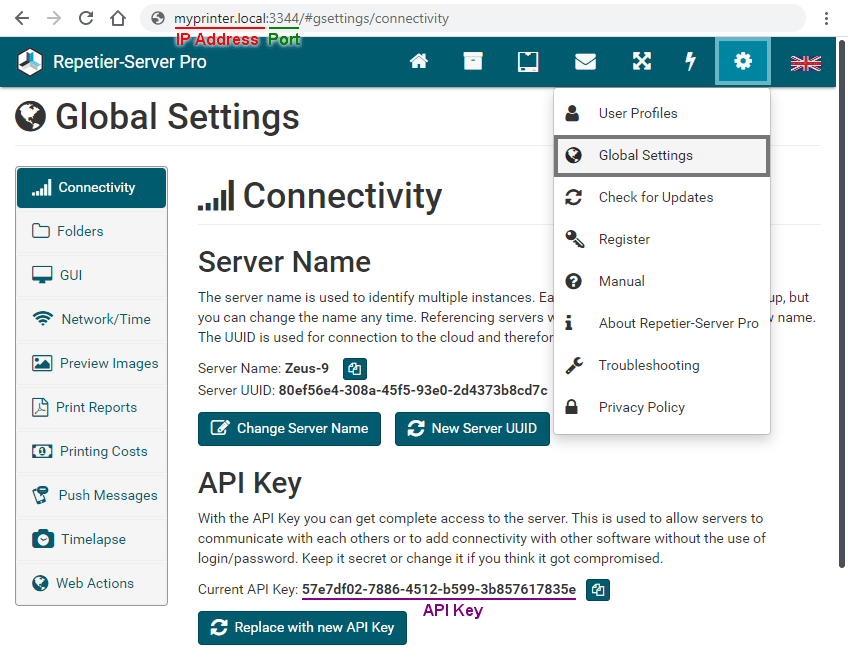
- Start Repetier-Server to set up your first printer.
- After that click at the top right and open Global Settings.
- Open Connectivity. Here you find all required data.
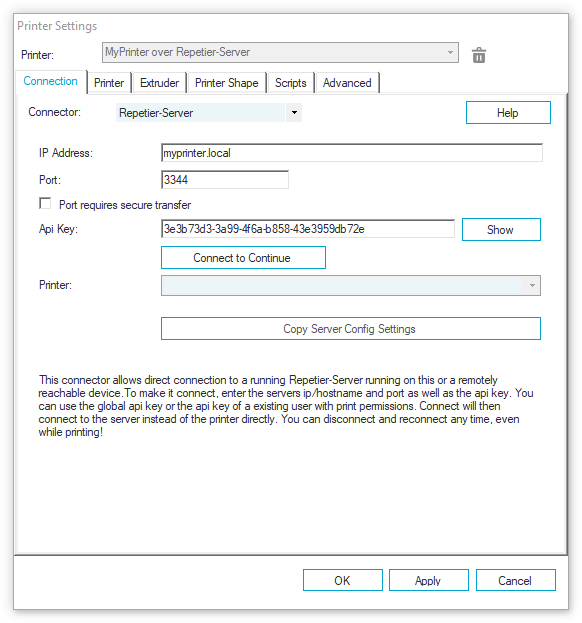
- Start Repetier-Host and click Printer Settings.
- Enter your printer name at the top at Printer.
- Select Repetier-Server as Connector.
- Enter your IP Address.
- Enter your Port.
- Enter the API Key.
- Click Connect to continue. The host now connects to the server and reads the printer list.
- Now you can select your Printer.
- Click Copy Server Config Settings to import the printer settings.
- Click OK to save.
Note: If you have set up multiple users, each user receives a separate API Key. The API key you enter in Repetier-Host gets the same rights of the respective user. In any case the global API Key will always work.
Workflow
When Repetier-Host is connected to the printer via Repetier-Server the workflow is nearly the same as usual, you just get a lot ov advantages and new possibilities.
To connect to the printer via Repetier-Server just select the printer:
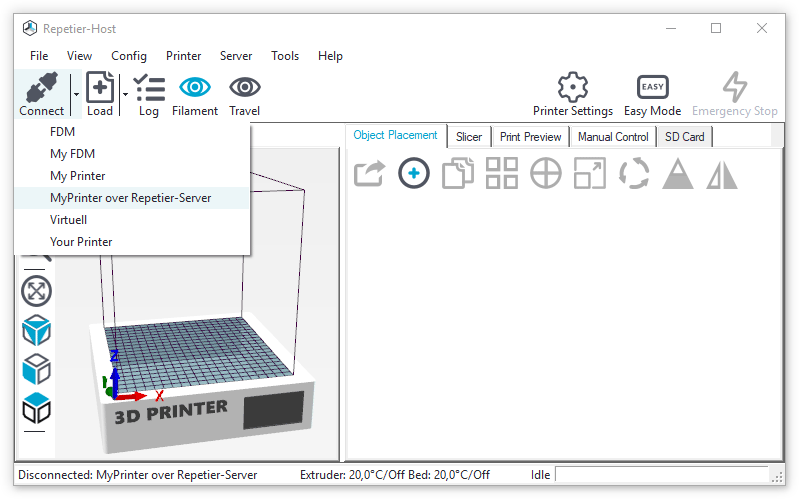
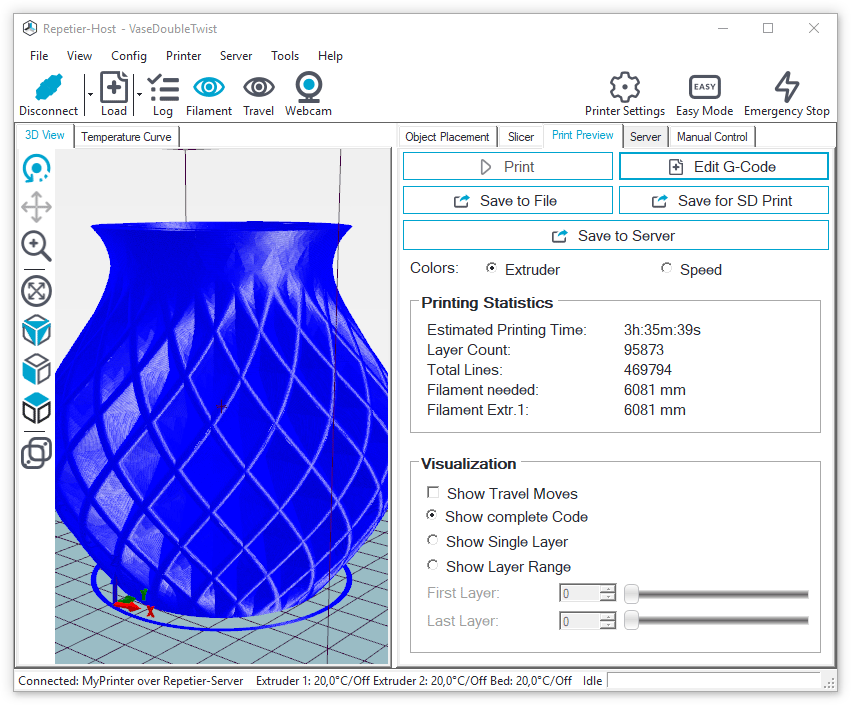
Object Placement, Slicer and Manual Control are exact the same as usual. After slicing you get a new page with printing statistigs and some options:
- Print: This sends the G-Code to the printing queue of the server. If the queue is empty, the print will start directly. The G-Code will not get stored permanently.
- Edit G-Code: Open G-Code Editor
- Save to File: Saves the sliced G-Code to a file. This does not affect the server.
- Save for SD Print: Saves the sliced G-Code along with a start/end code from the host and start/stop actions to a file. This does not affect the server.
- Save to Server: This stores the sliced G-Code on the server. It will not start a print directly.
Open the Server tab to manage and print all stored G-Codes. For each G-Code you get a rendered preview image and print statistics.
- Print: This sends the print job to the printing queue of the server. If the queue is empty, the print will start directly.
- Info: Here you get detailed infos like filament usage, volume, price, time, …
- Load: Click here to open the G-Code in Repetier-Host.
- Delete: This will delete the G-Code on the server.
